Software components
A software component encapsulates a set of related functions. The Software Components view shows all the software components selected in the active project of a solution.
You can:
-
Modify the software components of the project.
-
Manage the dependencies between components for each target type defined in your solution, or for all the target types at once.
Software Components view
Open the CMSIS view and click ![]() to open the
Software Components view:
to open the
Software Components view:
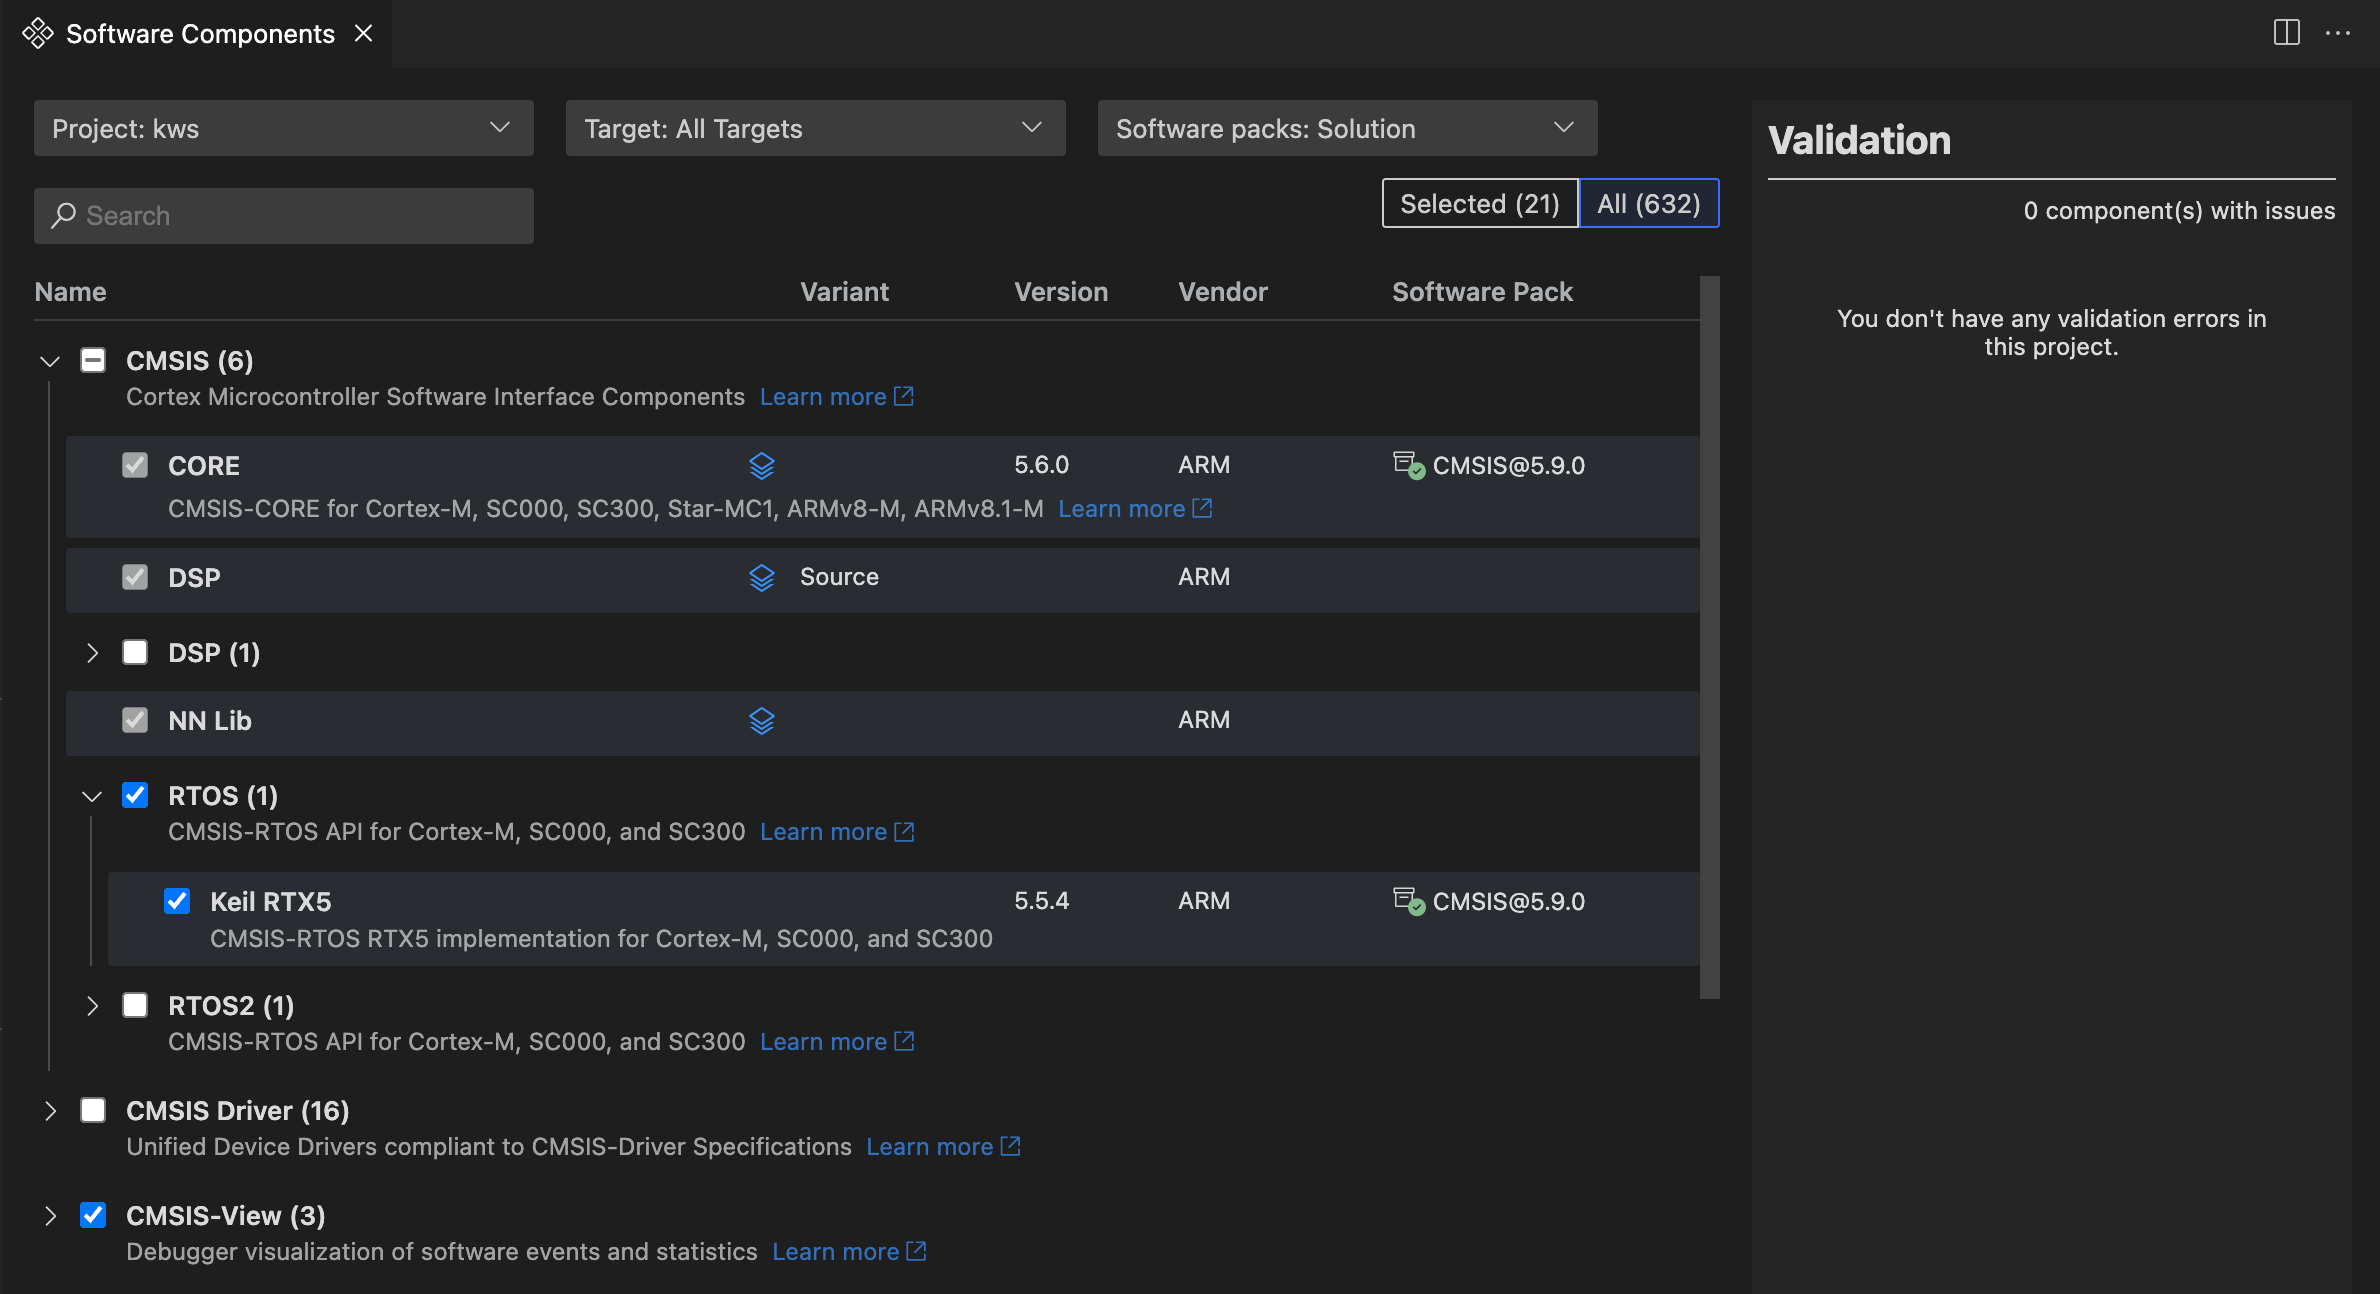
You can:
- Switch between components and software packs.
- View only components that are part of the csolution or components from all installed packs.
- Set the context for which the component selection applies (including layers).
- Select/remove software components.
- View more information about the component (name, pack, version, and description).
- Select different variants of a component.
- Open related documentation.
Validation
In the Software Components view, you can manage the dependencies between components and solve validation issues.
Issues are highlighted with a yellow exclamation mark icon ![]() .
.
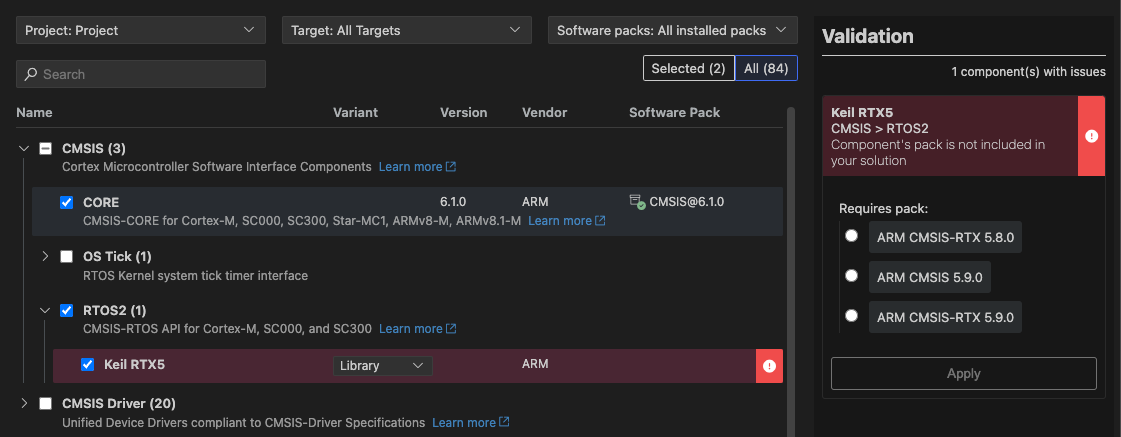
If there are validation issues:
- Either click on
 and select the issue in the pop-up box (a) or
 - Click the "Resolve" button for access to the pop-up box (a).
- Once a components with validation issues is opened, you can use the "eye" icon to see which component is missing/affected (b).
- Use the "Apply" button to select the missing components (only available if there is no choice between different components available).
When done, don't forget to Save the changes!